Pending transactions are any transactions that are marked with the "Pending" status. Use Pending transactions to plan ahead for upcoming transactions either by using scheduled transaction to create them or by recording transactions manually and listing them with the "Pending" status. Any transactions marked as "Pending" are available for review and editing in the Scheduled Transactions - Pending section. Transactions marked as "Pending" that have dates on or before today are considered to be overdue transactions and will be shown with an orange background color in accounts by default. Transactions posted early with dates after today will be shown with a yellow background color in accounts by default. You can customize the background color for early posted or overdue transactions in the Colors preferences. By posting transactions early and using the "Pending" status you will be able to track additional balances for accounts such as being able to view the total amount for pending transactions.
Record, review and edit pending transactions in the Scheduled Transactions - Pending section, the Transactions section, or within an account's Transactions section. Learn how to record, edit and post pending transactions in the Pending section's transactions table list view or calendar view below.
Table list view
General layout info:

![]() Tip:
When viewing transactions in the table list view, you can control the fields shown for transactions by adjusting the optional columns.
For example, you can add the "Memo" or "Check #" columns in order to view and edit the memos and check numbers for transactions.
Adjust the optional columns for a table by using the program's View → Columns menu or by Control-clicking on an uneditable area of the table.
Tip:
When viewing transactions in the table list view, you can control the fields shown for transactions by adjusting the optional columns.
For example, you can add the "Memo" or "Check #" columns in order to view and edit the memos and check numbers for transactions.
Adjust the optional columns for a table by using the program's View → Columns menu or by Control-clicking on an uneditable area of the table.
Editing layout info:

Record a pending transaction (List view):
- Click the
 button above the transactions area or press Command-N to create a new transaction.
When you create transactions in the Scheduled Transactions → Pending section, new transactions will have the "Pending" status by default.
button above the transactions area or press Command-N to create a new transaction.
When you create transactions in the Scheduled Transactions → Pending section, new transactions will have the "Pending" status by default. - Enter the details for the transaction. Add splits to the transaction if needed and/or add attachments.
- Save the transaction by pressing Command-E, by pressing Return, or by clicking "Save".
- Click "Cancel" or press Escape (Esc) to cancel creating a new transaction or to cancel any changes made to an existing transaction.
Edit a pending transaction (List view):
- Select the pending transaction you want to edit. If transactions are locked for editing, click "Edit" or press Command-E to begin editing the transaction.
- Update the details for the transaction. Add splits to the transaction if needed and/or add attachments.
- Save the transaction by pressing Command-E, by pressing Return, or by clicking "Save".
- Click "Cancel" or press Escape (Esc) to cancel any changes made to the transaction.
Edit multiple pending transactions (List view):
- Select the pending transactions you want to edit.
- Use the options in the Transactions menu or Control-click on the transactions to be shown a menu of options.
![]() Tip:
To more easily locate and select transactions, you can sort transactions by column to group transactions by a setting.
Plus you can control the transactions shown by changing the account's settings and/or by performing a transaction search.
Use the table view keyboard shortcuts to select multiple items quickly.
Tip:
To more easily locate and select transactions, you can sort transactions by column to group transactions by a setting.
Plus you can control the transactions shown by changing the account's settings and/or by performing a transaction search.
Use the table view keyboard shortcuts to select multiple items quickly.
Post a pending transaction (List view):
Posting a pending transaction changes its status from "Pending" to "Recorded". This will remove the transaction from the Scheduled Transactions → Pending section.
- Select the pending transaction(s) you want to post.
- Click "Post".
Keyboard shortcuts (List view):
- Create: Command-N
- Begin/End Editing: Command-E
- Add Split: Command-L
- Show/Hide Splits: Shift-Command-L
- Show/Hide Attachments: Shift-Command-I
- Save: Return or Command-E
- Cancel: Escape (Esc)
- Delete: Command-Delete
Review the full list of keyboard shortcuts
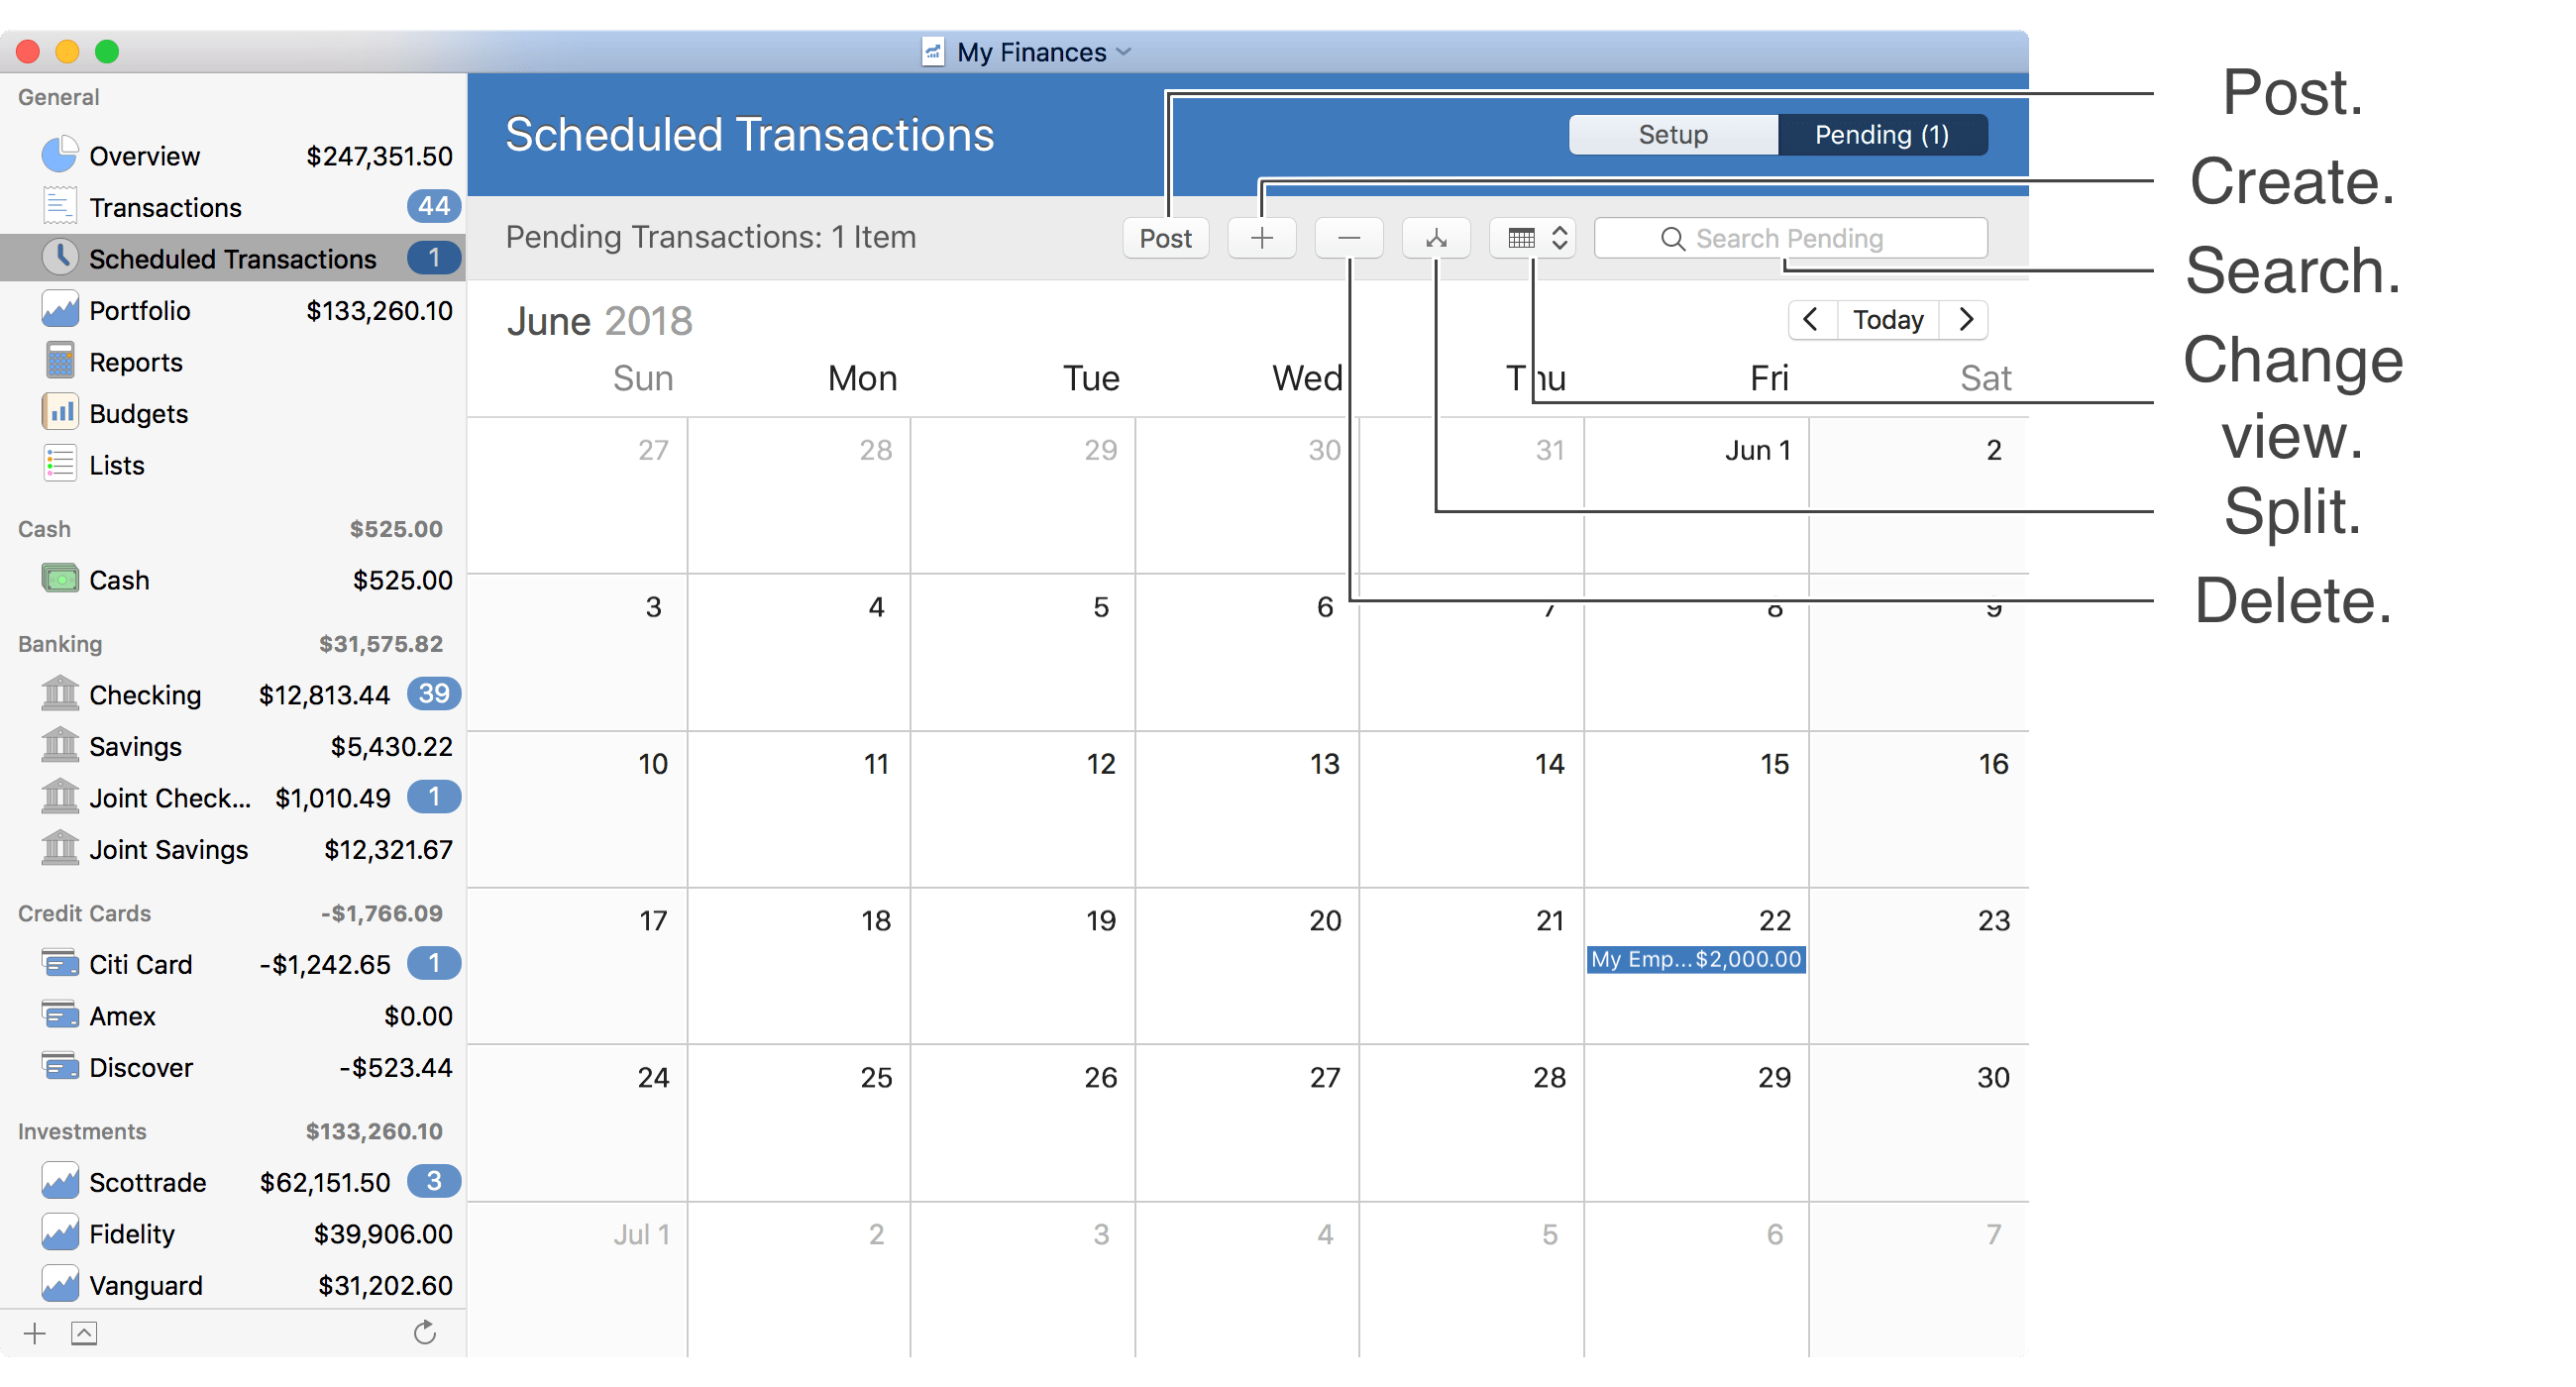
Calendar view
General layout info:
Editing layout info:
Record a pending transaction (Calendar view):
- Double click on a date, click the button above the transactions area, or press Command-N to create a new transaction.
When you create transactions in the Scheduled Transactions → Pending section, new transactions will have the "Pending" status by default.
- Enter the details for the transaction. Add splits to the transaction if needed and/or add attachments.
- Save the transaction by pressing Command-E, by pressing Enter, or by clicking elsewhere.
- Press Escape (Esc) to cancel creating a new transaction or to cancel any changes made to an existing transaction.
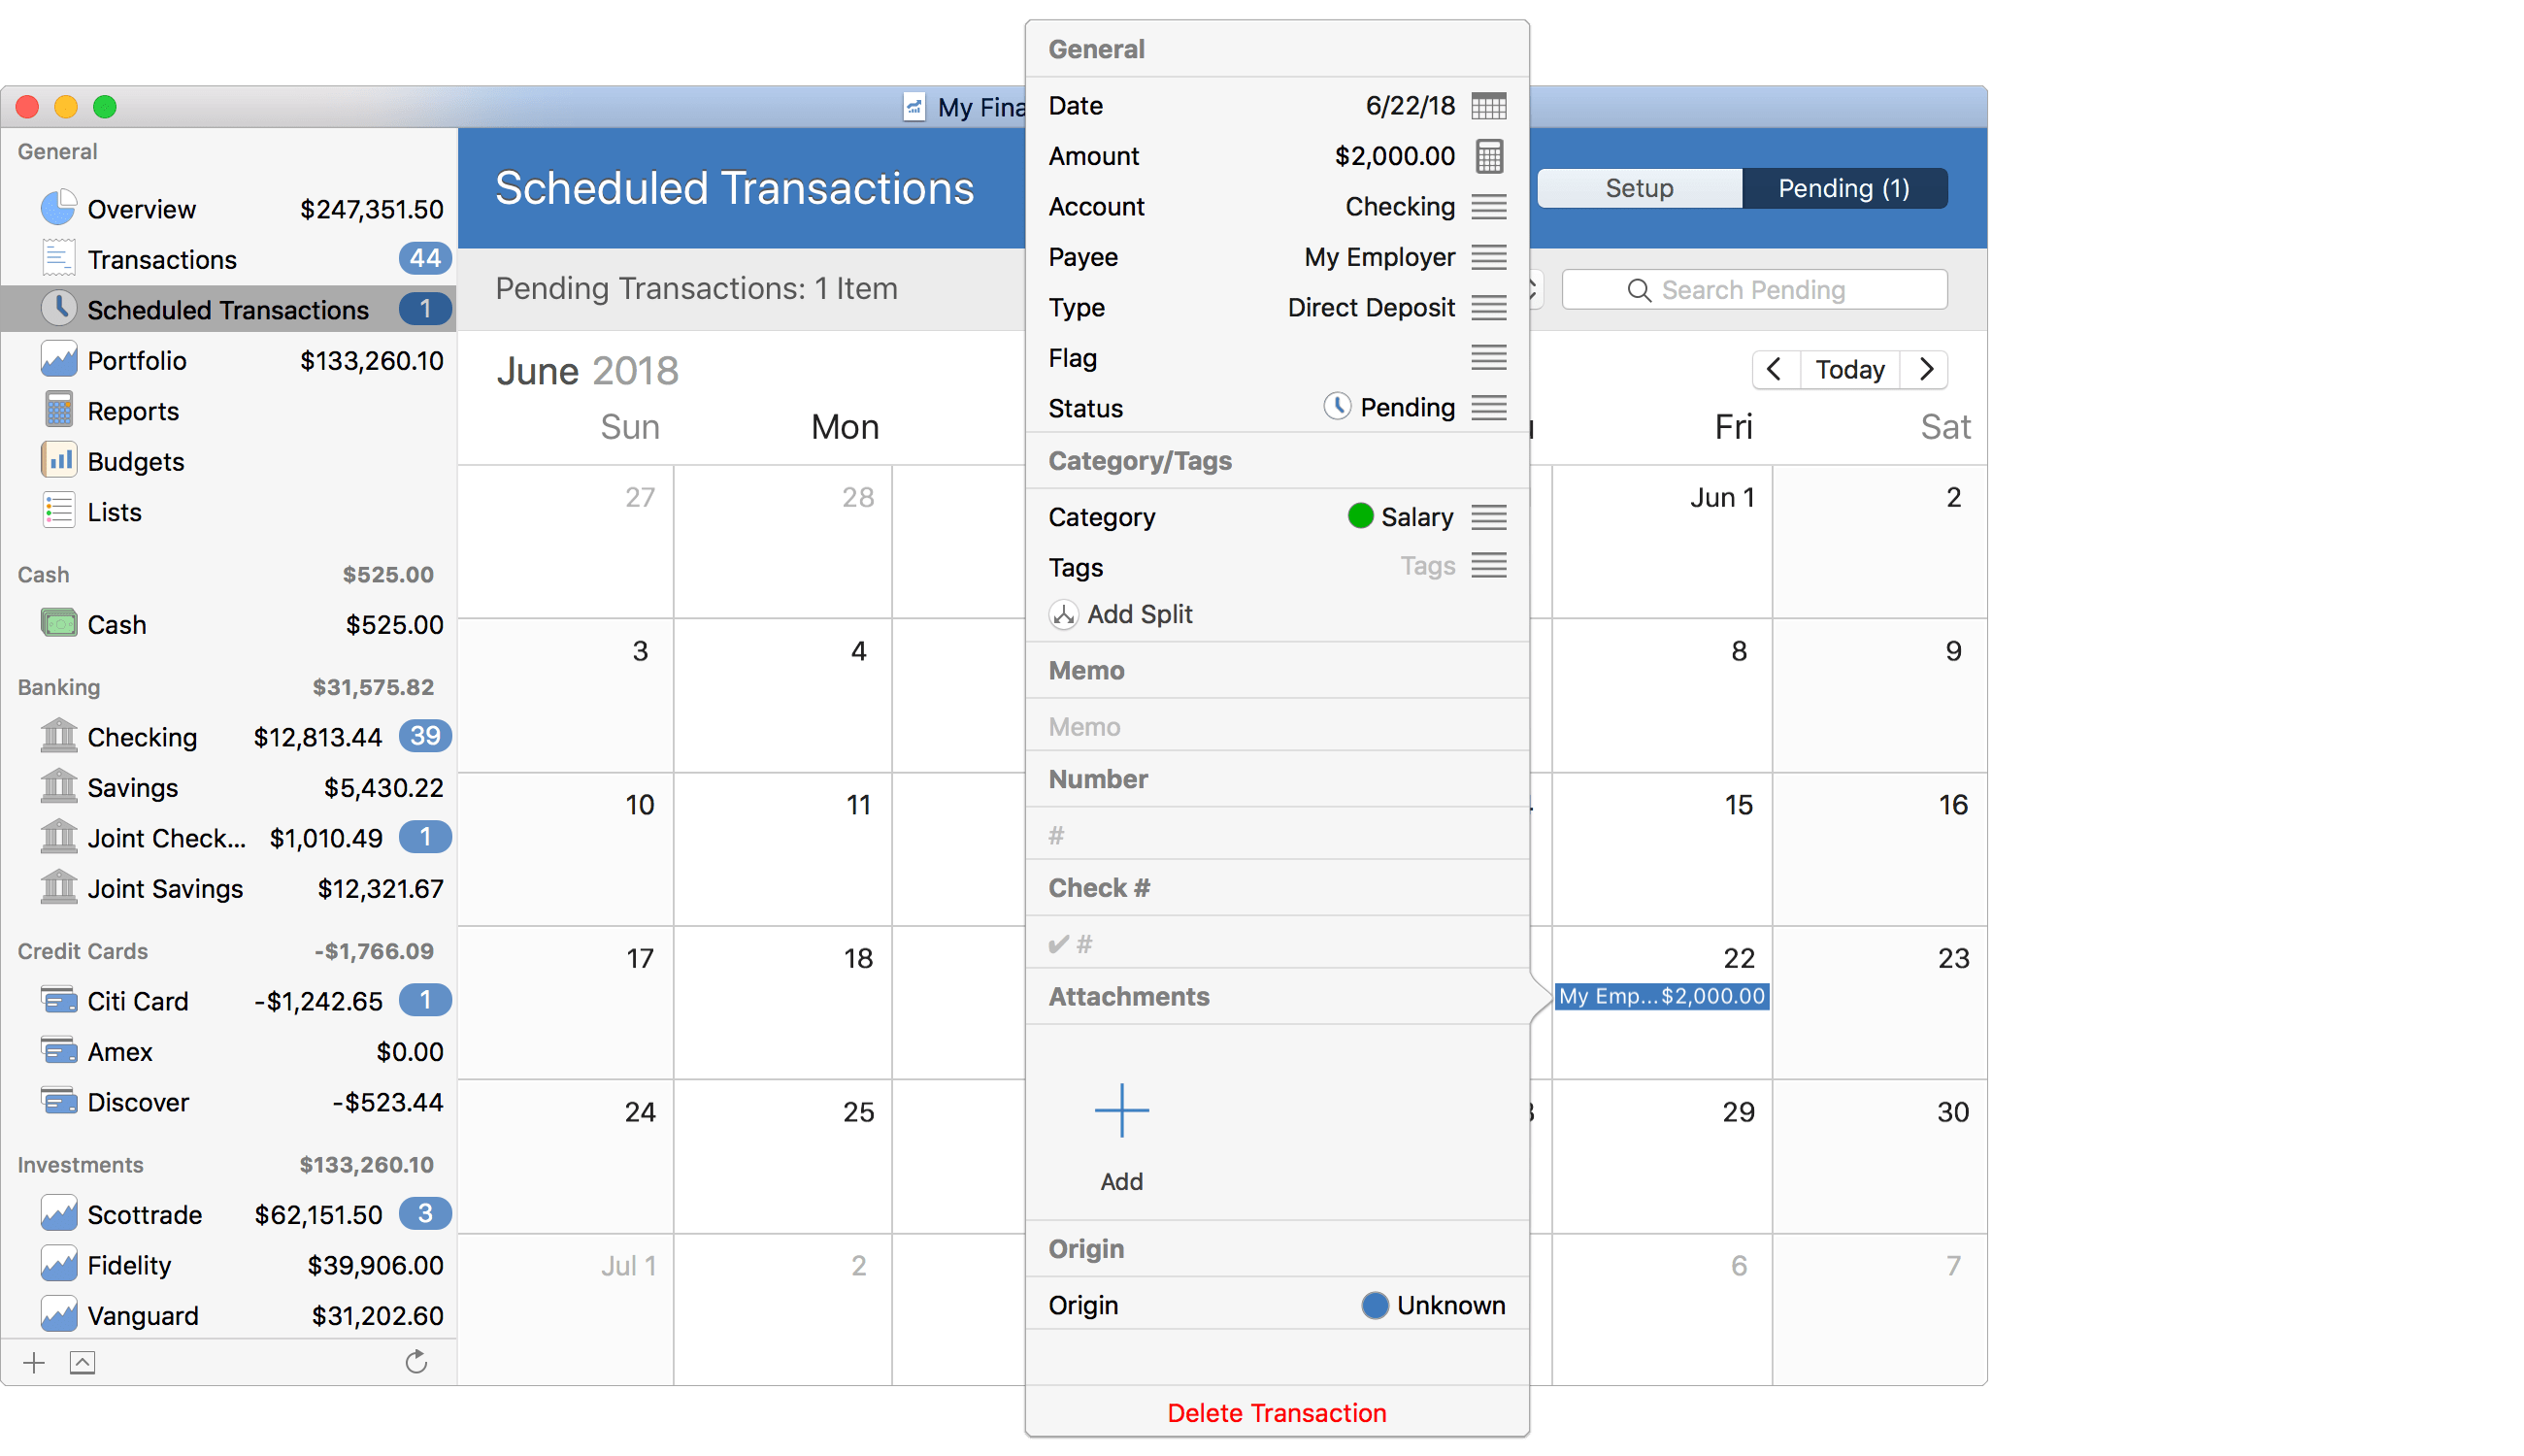
Edit a pending transaction (Calendar view):
- Double click on the pending transaction you want to edit. You can also select it and press Command-e or press Return or press the spacebar to show the popover.
- Update the details for the transaction. Add splits to the transaction if needed and/or add attachments.
- Save the transaction by pressing Command-E, by pressing Return, or by clicking elsewhere.
- Press Escape (Esc) to cancel any changes made to the transaction.
Edit multiple pending transactions (Calendar view):
- Select the pending transactions you want to edit.
- Use the options in the Transactions menu or Control-click on the transactions to be shown a menu of options.
![]() Tip:
To more easily locate and select transactions, you can control the transactions shown by changing the account's settings and/or by performing a transaction search.
Use the calendar view keyboard shortcuts to select multiple items quickly.
Tip:
To more easily locate and select transactions, you can control the transactions shown by changing the account's settings and/or by performing a transaction search.
Use the calendar view keyboard shortcuts to select multiple items quickly.
Post a pending transaction (Calendar view):
Posting a pending transaction changes its status from "Pending" to "Recorded". This will remove the transaction from the Scheduled Transactions → Pending section.
- Select the pending transaction(s) you want to post.
- Click "Post".
Keyboard shortcuts (Calendar view):
- Create: Command-N
- Begin/End Editing: Command-E
- Show Calendar Popover: Command-E, Return, or Spacebar
- Add Split: Command-L
- Save: Return or Command-E
- Cancel: Escape (Esc)
- Delete: Command-Delete
Review the full list of keyboard shortcuts