Get some tips and learn some tricks for SEE Finance.

Keyboard shortcuts
SEE Finance has many keyboard shortcuts to help speed up your workflow and increase your productivity. Press Command-N to create a new item. Begin or end editing by pressing Command-E. Easily get back to the sidebar by pressing Command-1. Pressing Shift-Command-Right Arrow and Shift-Command-Left Arrow will switch to the next or previous subsection within a section in the program such as to switch between the Transactions view and Overview views within an account. When editing dates, you can press T to enter the current date. Press + or - to increase/decrease the date by one day. Entering just a single number will result in setting that day for the current month. These are only a small fraction of the keyboard shortcuts available. Check out the keyboard shortcuts page to learn some more keyboard shortcuts.
Optional columns
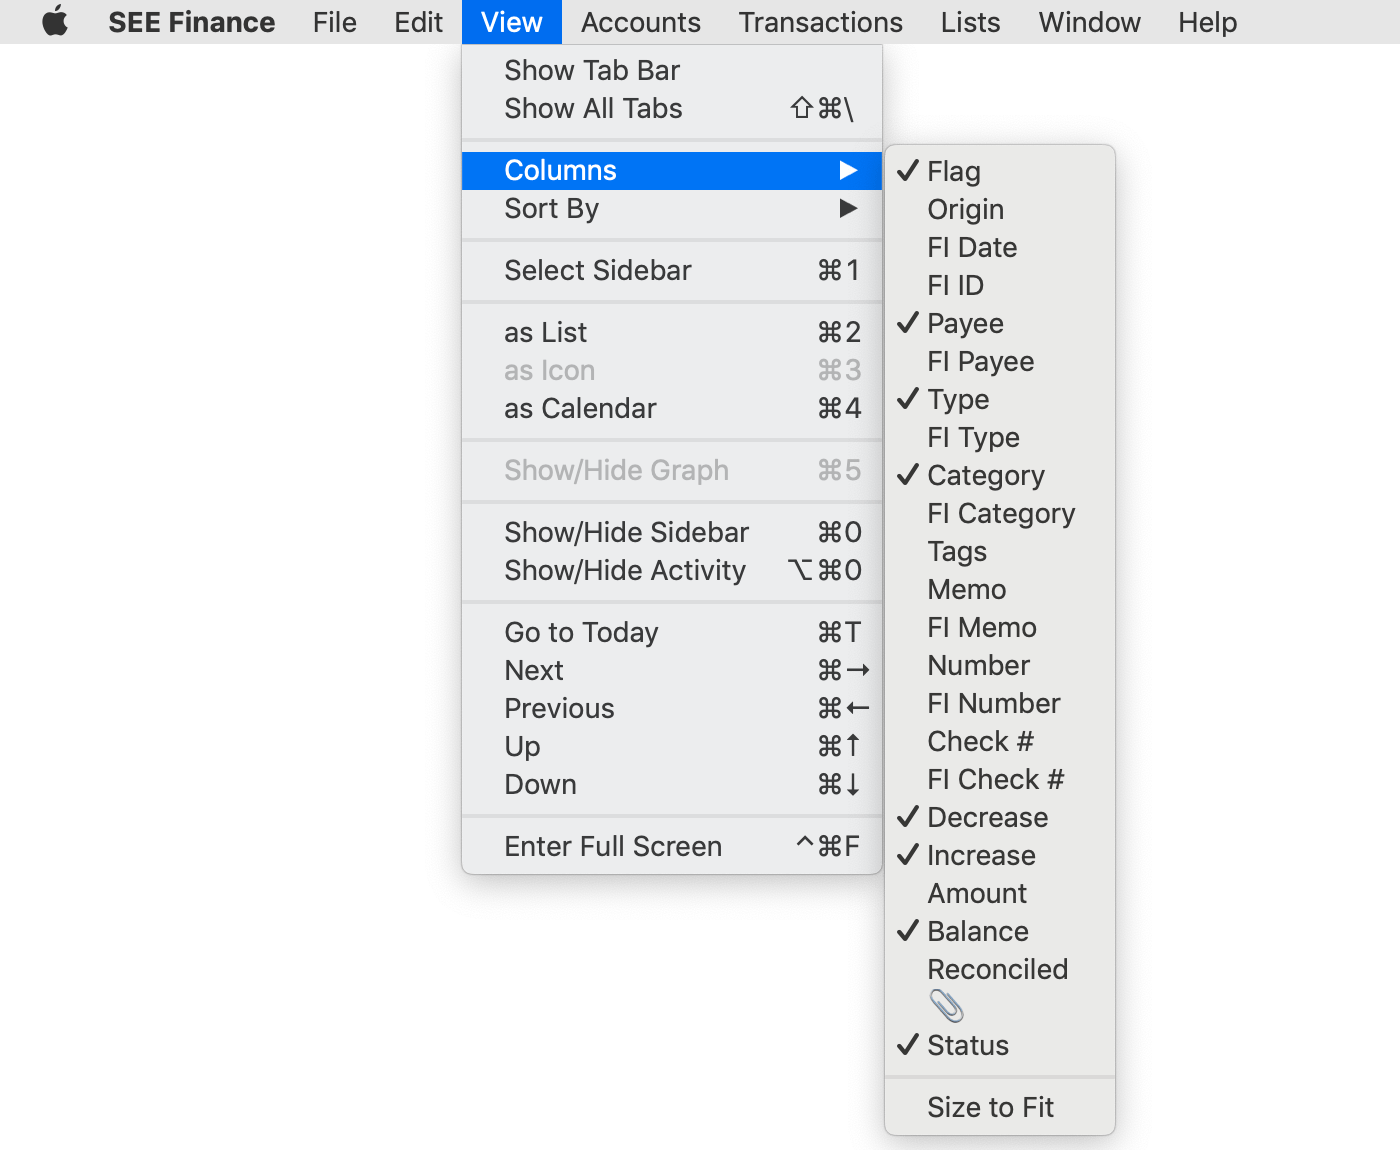
Most tables throughout SEE Finance 2 for macOS have optional table columns. You can add and remove the optional columns using the program's View → Columns menu or by Control-clicking on an uneditable area of the table. Add the "Memo" column to view/edit memos for transactions plus other options. For users that download/import transactions, you can add the various "FI" columns to view the raw values from the Financial Institution.
Bulk editing
Many tables allow for multiple selection and have contextual menus, accessed by Control-clicking on an uneditable area of the table, with options to edit the selected items. When selecting items from lists that have checkboxes, such as when importing transactions or selecting the categories for a category report, you can use multiple selection and press the spacebar to quickly toggle the checkboxes on or off.
For editing transactions in bulk, you can select multiple transactions and use the Transactions menu options for setting values. When combined with custom date ranges and searches you should be able to easily locate and group transactions that you need to edit in bulk.
List item entry and selection
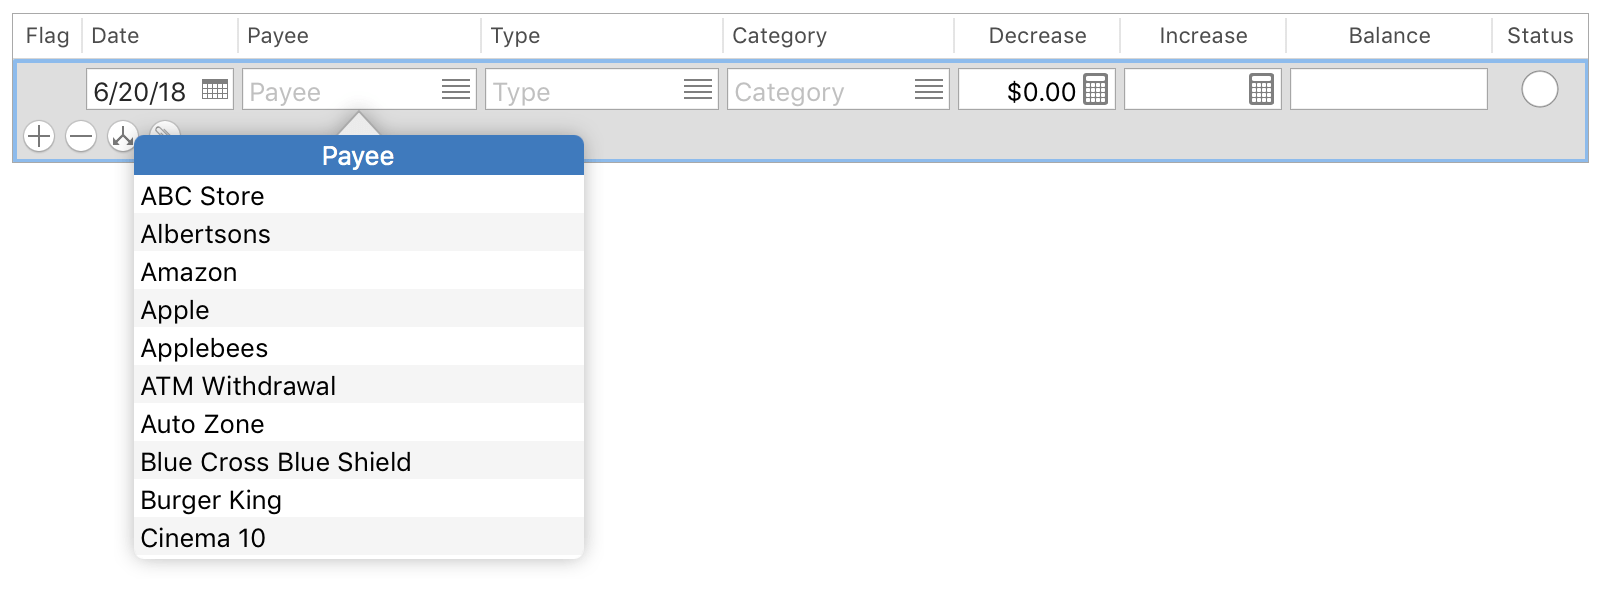
We've created custom controls to make entering and selecting items in lists as easy as possible. The fields for entering and selecting the payee, transaction type, category and tags for transactions have popup lists to help assist in selecting existing items. These fields work as both an entry field and as a search field. Begin typing to display the popup list and easily narrow down the list by typing a partial value of an item. When the popup list is displayed, you can use the up/down arrow keys to change the selection. Using the mouse is completely optional.
Selecting tags from the popup list is slightly different due to being able to set multiple tags for a single transaction. You can select an existing tag or create a new one by entering the tag's name and then press the comma key to add the tag. When the popover list of tags is shown, you can scroll the list of tags using the up and down arrow keys and press enter/return to toggle the checkbox on/off for the selected tag. No mouse required.

Entering dates
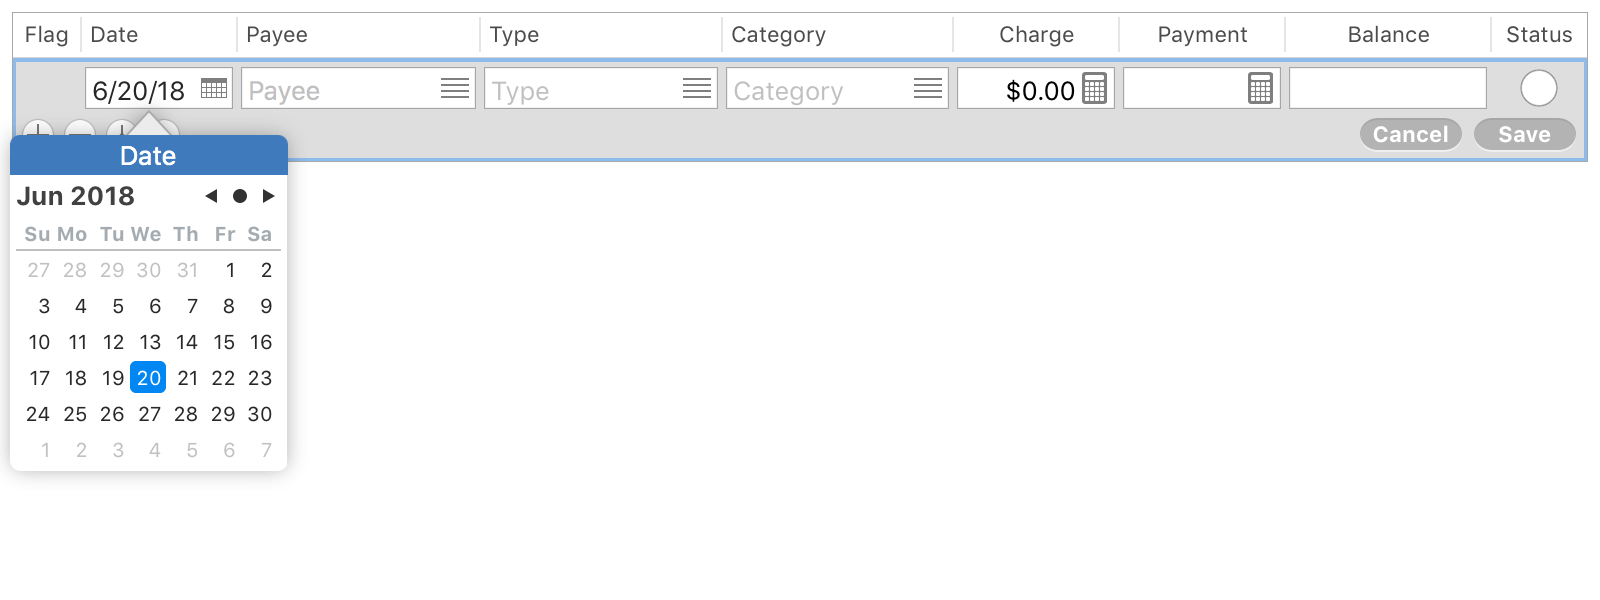
We've made entering dates easy too. The fields for entering dates have a small calendar button you can use to view a popup calendar. Simply starting to type a date value will display the calendar. You can also use many date entry keyboard shortcuts to quickly enter dates. Some of them include pressing t to quickly set today's date. Pressing the + or - keys to increase or decrease the date by one day. Using the [ and ] keys to go back and forward one month. You can also type in partial dates such as typing 20 to set the 20th of the current month.
There's also the Transactions preferences option for the default date of new transactions. You can have new transactions setup to have the current date, the date from the latest transaction in time, or the date from the last transaction that was recorded.

Amount calculators
Most numeric entry fields in macOS allow you to make quick calculations that are shown in a running ledger in a small popover. You can show the calculator popover by clicking the calculator button, pressing the = key, or you can simply type in a number and then type a mathematical operator (+, -, /, * or x) to begin a calculation. The calculations will update while you type and you can press the = key or, enter/return, or simply change to the next field to accept the calculated amount.
Flags for transactions
Newly downloaded and imported transactions get flagged as "Unreviewed" by default. The number of "Unreviewed" transactions is listed to the right of an account's balance in the main account list. Both of these are program preferences that you can adjust. The "Unreviewed" flag will be cleared simply by selecting the transaction by default. You can also create any custom flags you'd like. Flags can be customized for color and other settings such as specifying whether or not they are cleared upon selecting the transaction, like the "Unreviewed" flag, or if they remain until you clear them.
Transaction status
Transactions can be assigned with one of five different status options: "Pending", "Recorded", "Cleared", "Reconciled" and "Voided". Although completely optional, utilizing these status settings can assist in tracking your finances. These options let you track information such as the cleared balance and reconciled balance for accounts and the value of pending transactions. The number of transactions marked as "Pending" can be found to the right of the Scheduled Transactions listing in the main account list. Any transaction marked as "Pending" can be easily accessed in the program's Scheduled Transactions - Pending section.
Account balances
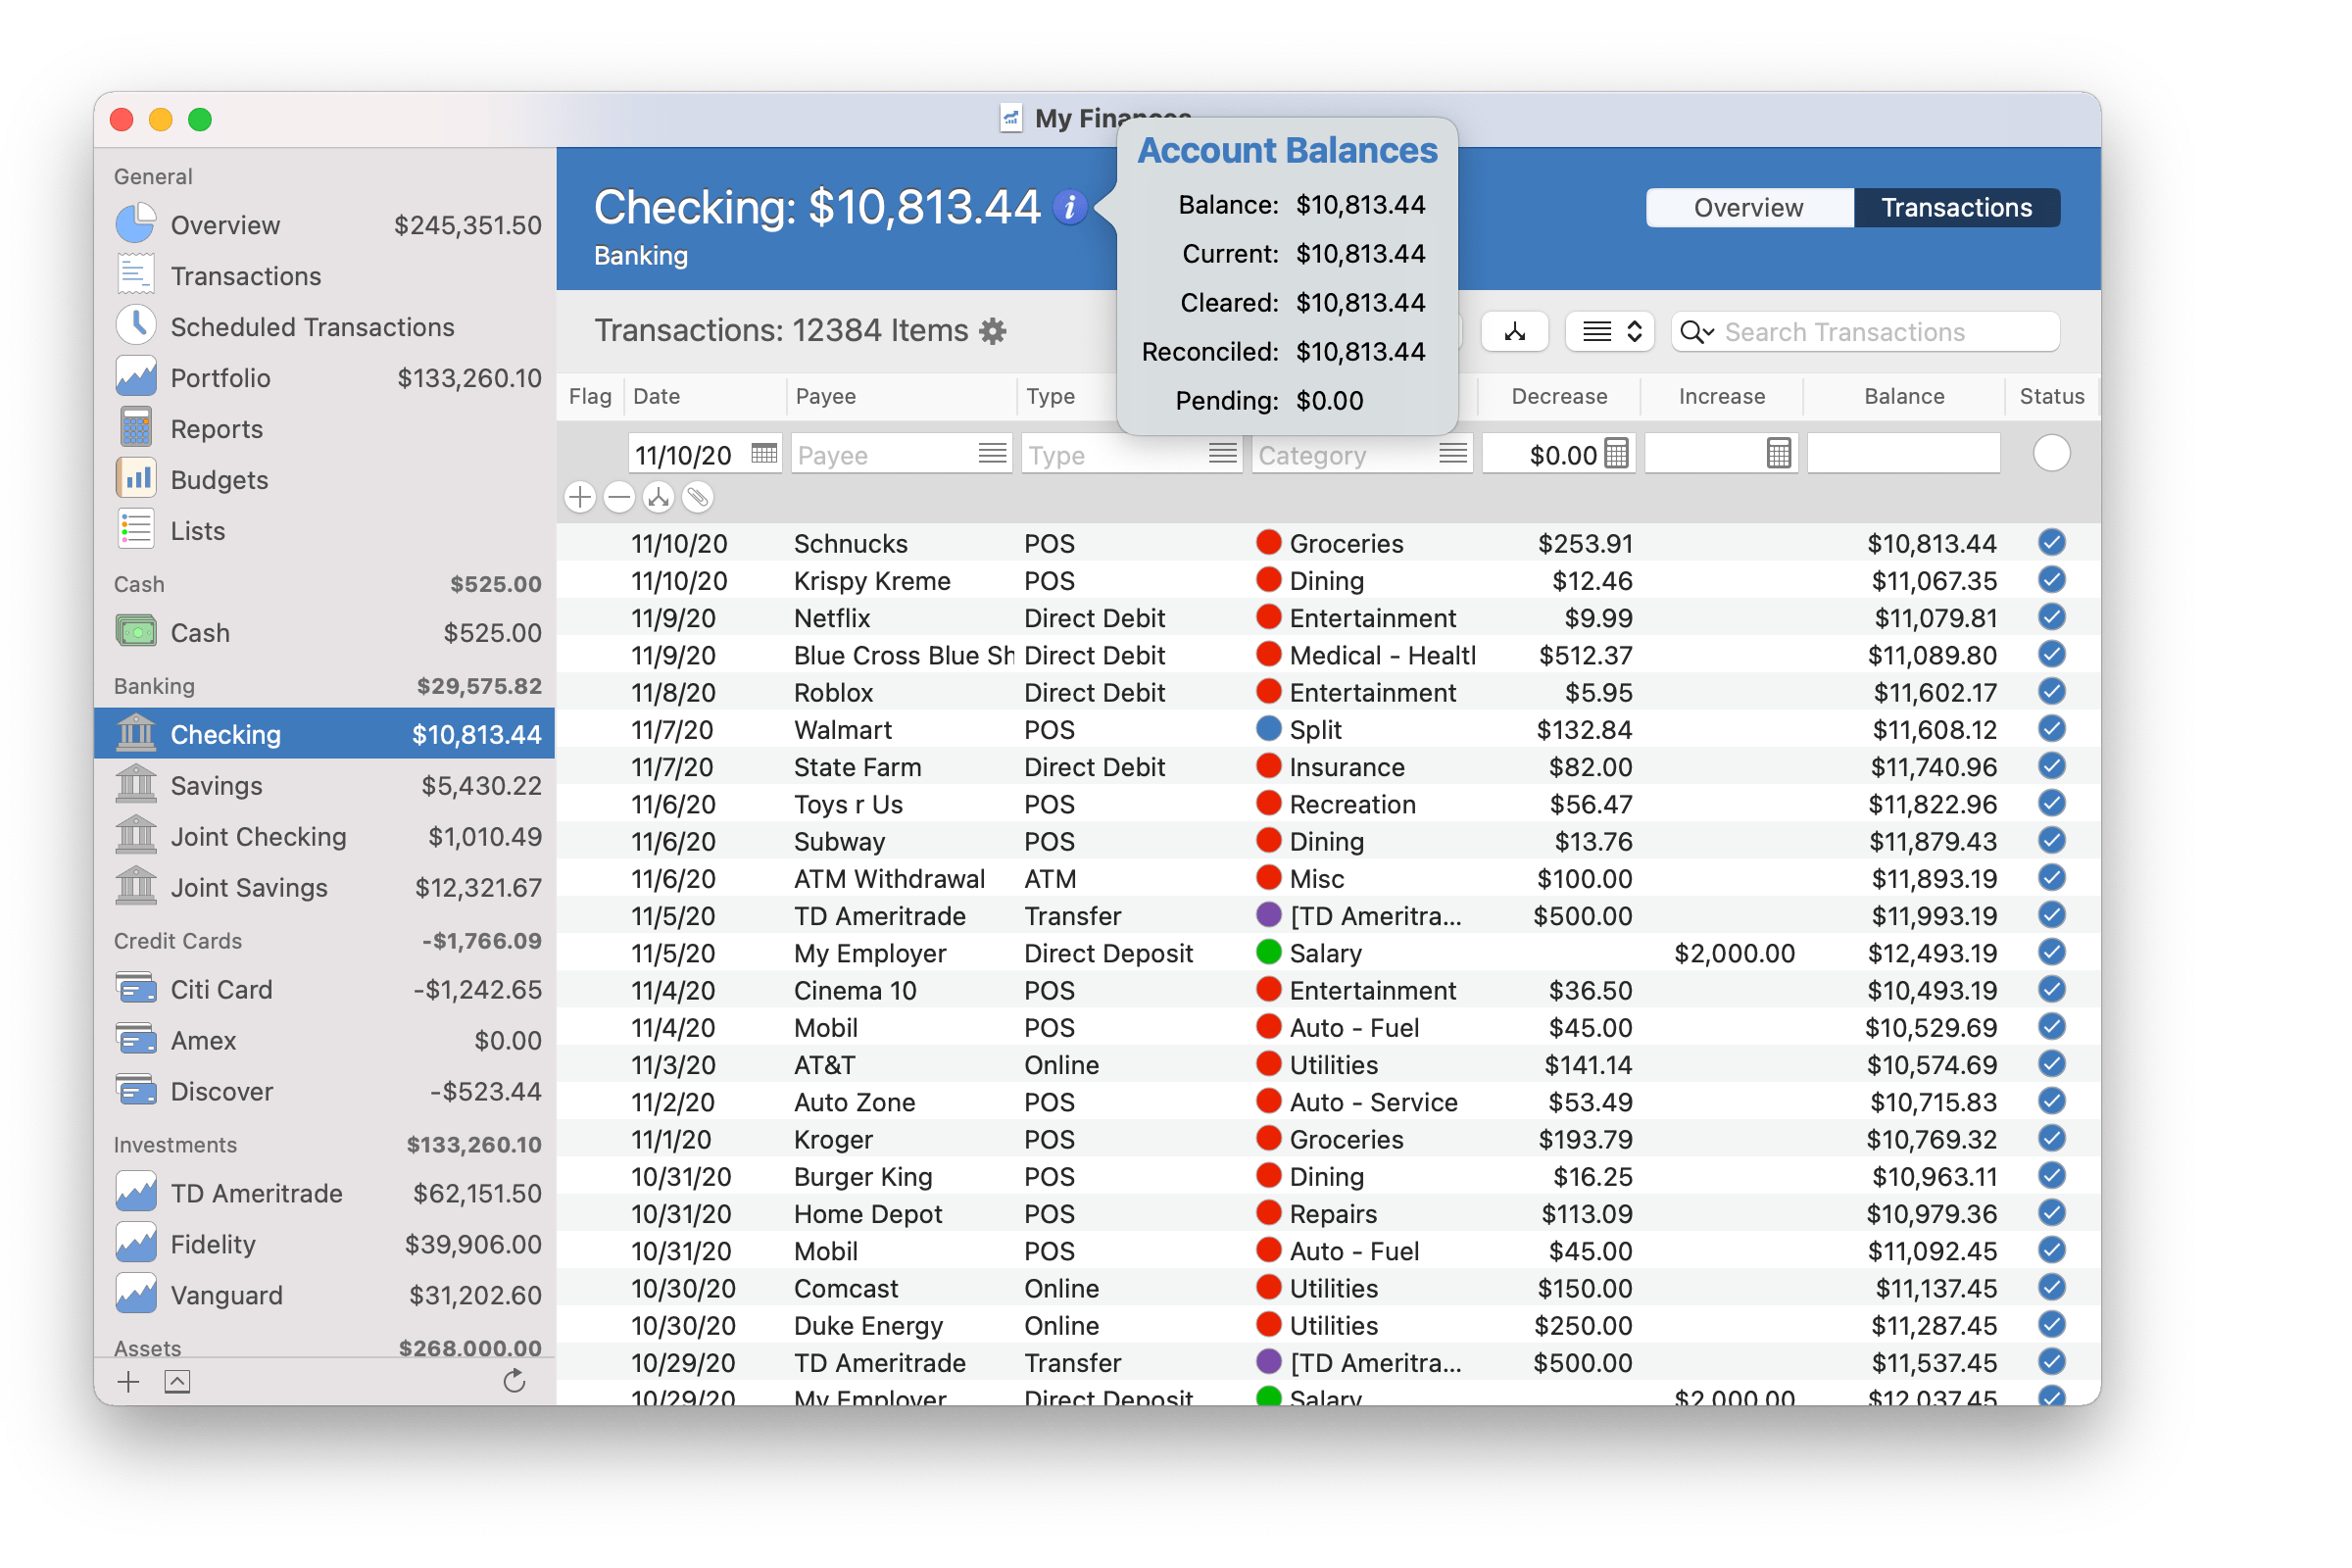
Through the use of the transaction status options and posting transactions early, you can track additional balances for accounts. The listed balance for accounts is the sum of all transactions in the account as of today, but may or may not also include early posted transactions based on Accounts preferences. In addition to the shown balance, you can also view the account's "Current" balance which includes all transactions through today. The "Cleared" balance which is the sum of all transactions marked as cleared or reconciled. The "Reconciled" balance which is the sum of all transactions marked as reconciled. The "Pending" balance which is the sum of all transactions marked as pending or that are after today. If the account has a download connection setup, you can also view balance information as provided by the institution.
You can hover the mouse over the blue info button to the right of the account's name and balance at the top of the window to view additional balance information.
Attachments
You can attach any number of images to transactions. You can attach almost any file you want except for your file for the program. When adding attachments the program makes a complete copy of the original attached file and keeps it inside your file for the program. You can use attachments to make the program your digital financial locker. Keep copies of receipts, warranties and manuals then access them from any of your Mac and iOS devices.
Powerful search options
Find items across the program using searches. There's a search field towards the top right in most views throughout the program. When searching transactions you can make the search specific to payee, category, tags and/or memo with even more options available on macOS. During transaction searches you can view the number of transactions in the search plus a search total. You can combine searches along with other options such as custom date ranges.
Customize colors
There's are a variety of options to make use of color in the program to assist you in tracking your finances as well as make doing so more enjoyable. Customize the colors for accounts, payees, categories, tags and other items to help you more easily identify the information throughout the program. The program's Colors preferences allow you to control how colors are used throughout. Customize how colors are used in accounts including the option to control the colors for positive and negative amounts. Turn on or off the use of colors for identifying payees, transaction types and categories. Use specific background colors for transactions posted early and/or for overdue transactions.
Fonts & sizes
One size usually does not fit all. On macOS, you can take advantage of the program's Fonts & Sizes preferences to control the font and height of rows in the program. macOS includes a variety of fonts that you can use in the program to make it right for you.
Customize reports
All of the reports can be customized to fit a wide variety of needs. Control which accounts are included, customize date ranges, add comparative intervals, subgroup transactions within a report and much more. Look for Tips sections on the help pages of the different reports available in the program to learn more.
Download everything at once
Download everything
Any file that has a download connection setup, securities that can download prices, or makes use of multiple currencies will display a refresh button underneath the main account list on the right side. Use the refresh button to download transactions, security prices, and/or exchange rates all at once. When doing so the refresh button will turn into a spinning progress indicator while the downloads are being performed. You can review the current activities being performed by clicking the show activity button underneath the main account list.
Hide and show accounts
Control which accounts are shown or not in the sidebar. The hiding and showing of accounts in the main sidebar of accounts is saved on a device type basis to allow you to control which ones are shown when viewing them on your Mac, iPhone and iPad. You can also specify which accounts are included in balances, which are included as selectable options in reports, and which ones are included in other lists. You can select "Hide and Show Accounts..." from the program's "Accounts" menu.
Rearrange accounts
You can rearrange the order of how the account types and individual accounts are listed in the main sidebar of accounts. You can rearrange account types and individual accounts by dragging and dropping them into the desired order.
Data security
SEE Finance was designed to allow users to keep their data completely under their control as well as enable them to access their data from multiple devices. With the exception of account download login credentials and account numbers, your data for the program is stored in your file(s) for the program. You choose and control the location of your data file(s). Sensitive information, such as download connection login credentials and account numbers, are stored securely in your Apple Keychain or not at all. Learn more about keeping your SEE Finance data secure on your Mac, iPhone and iPad.
Preferences
SEE Finance truly allows you to make personal finance personal through all of the preferences available. Ranging from options how your finances are displayed to options how you record them, SEE Finance allows you to tailor fit the program to fit your needs. Be sure to check out all of the preferences available. You can access the program's preferences through the program's main SEE Finance menu located at the very top left of your screen or by pressing Command-Comma (,).