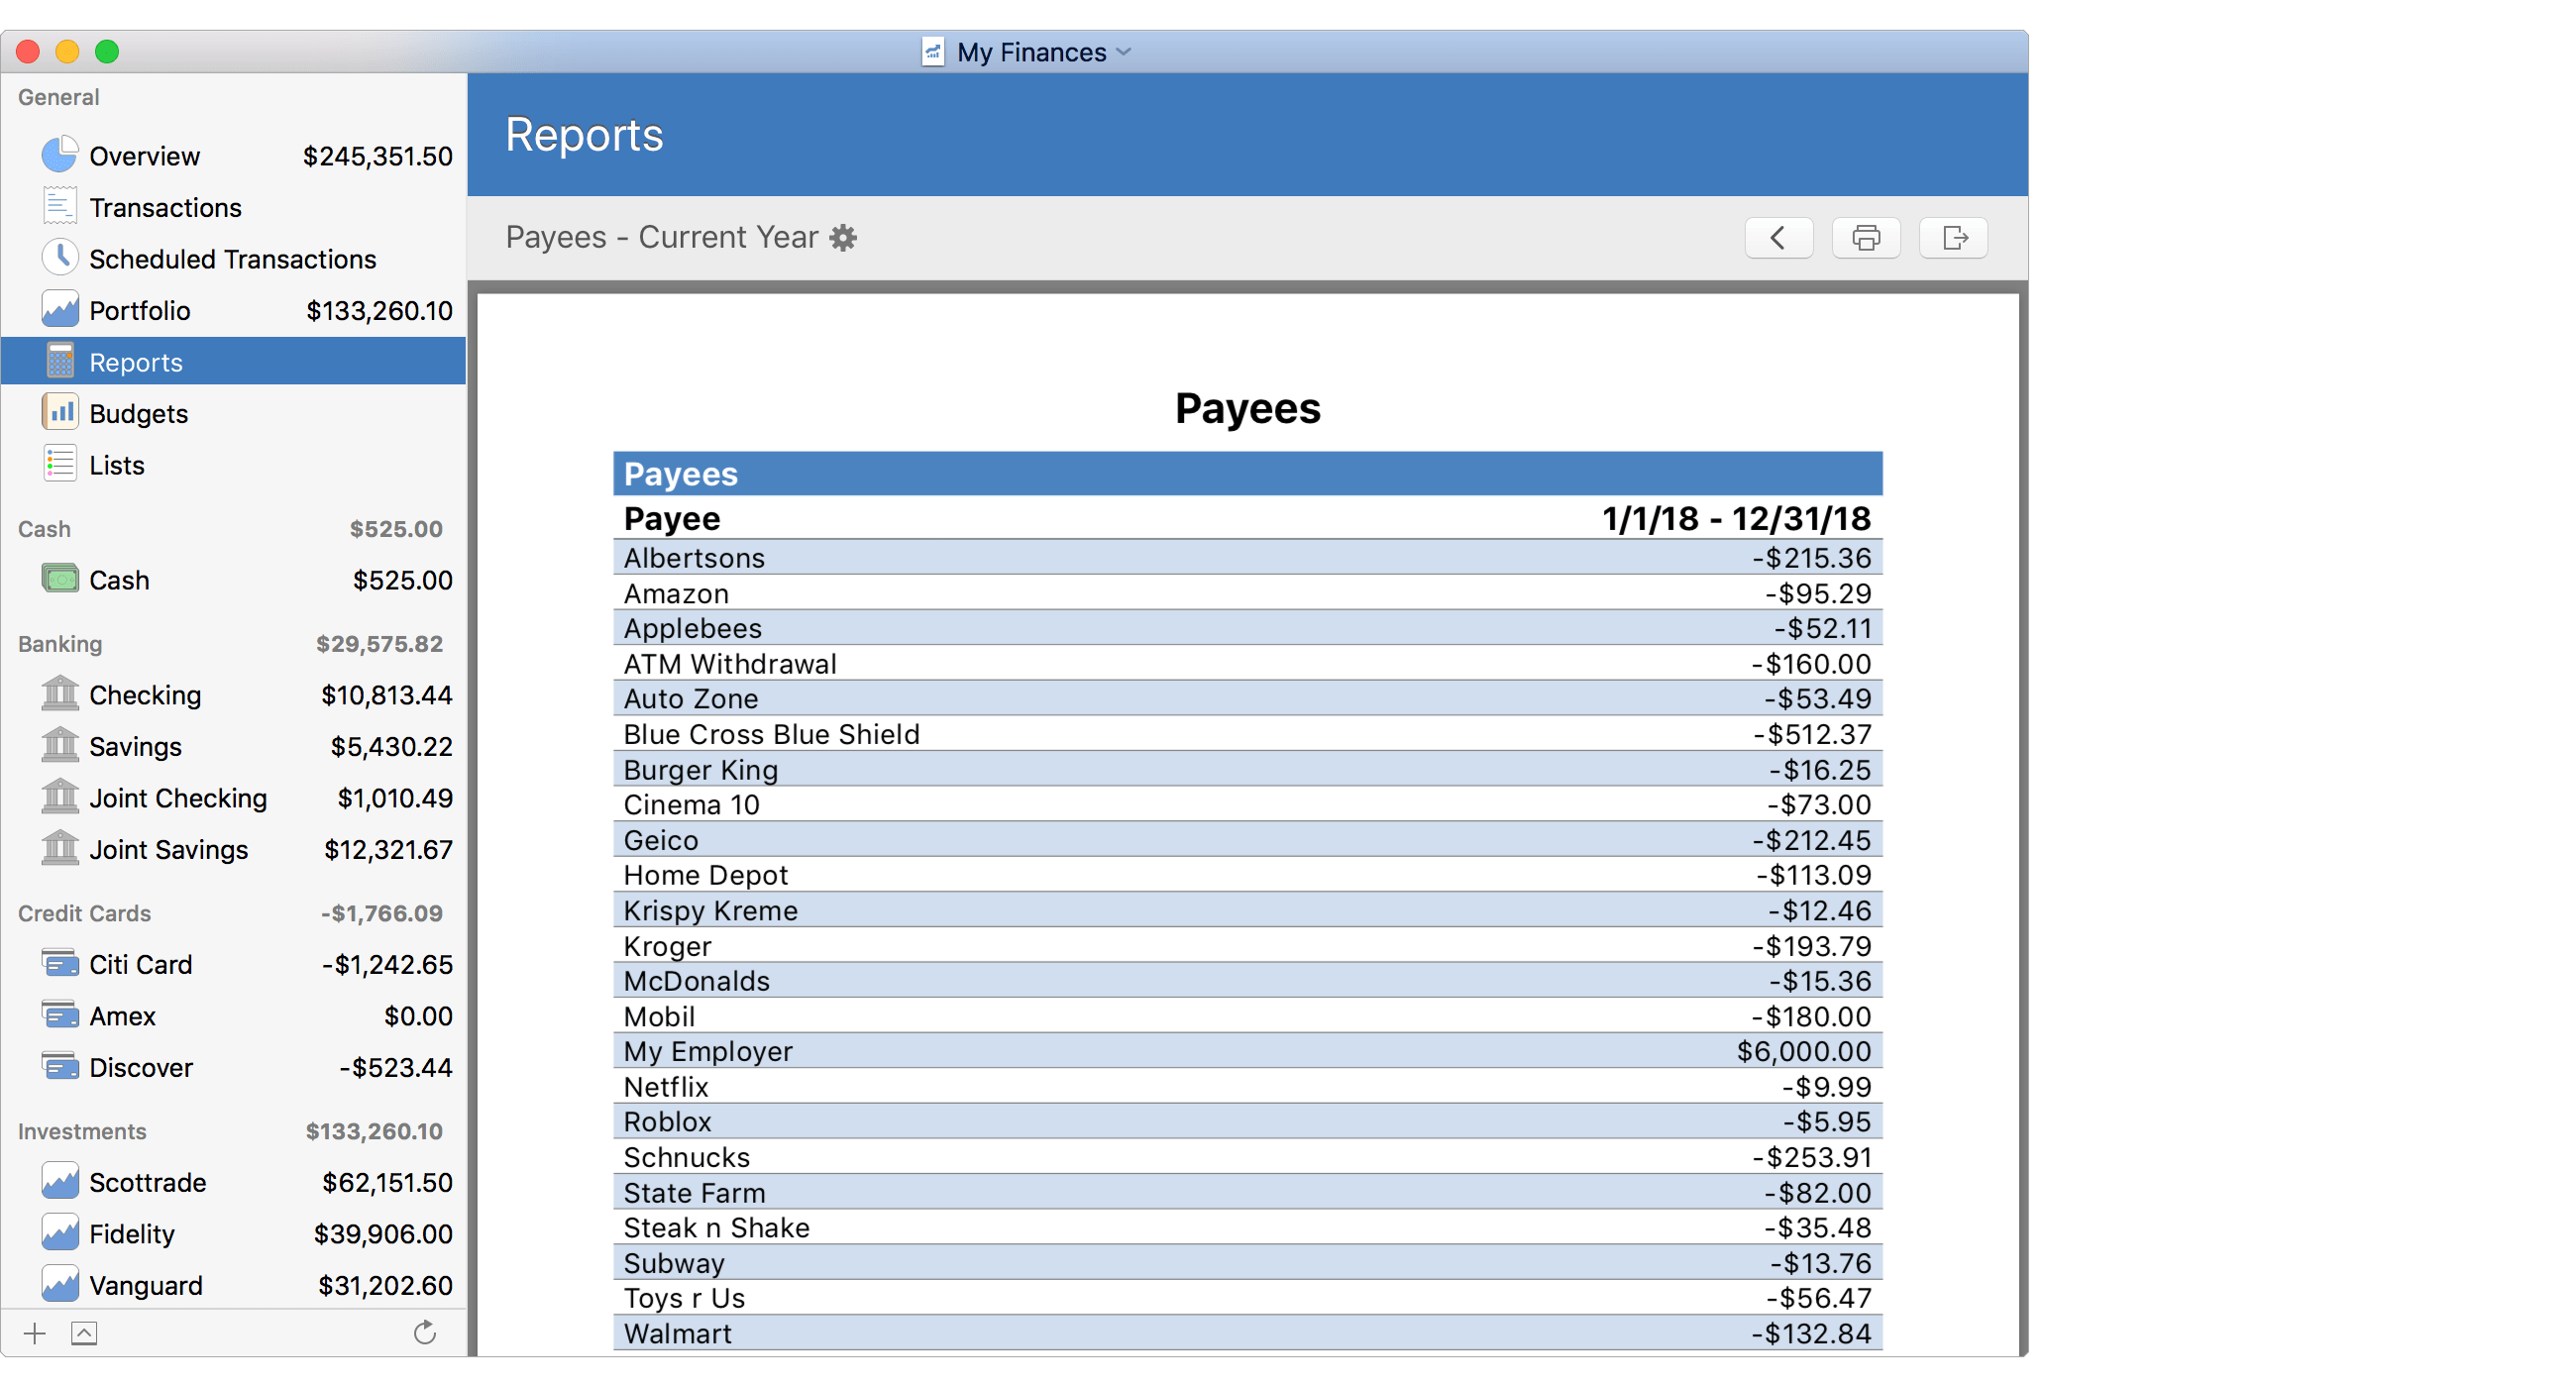
Payee report setup
Edit the general settings for the report as desired and then select to "Continue" or to be "Finished" setting up the report depending if you have chosen to select specific accounts, payees, or tags for the report.
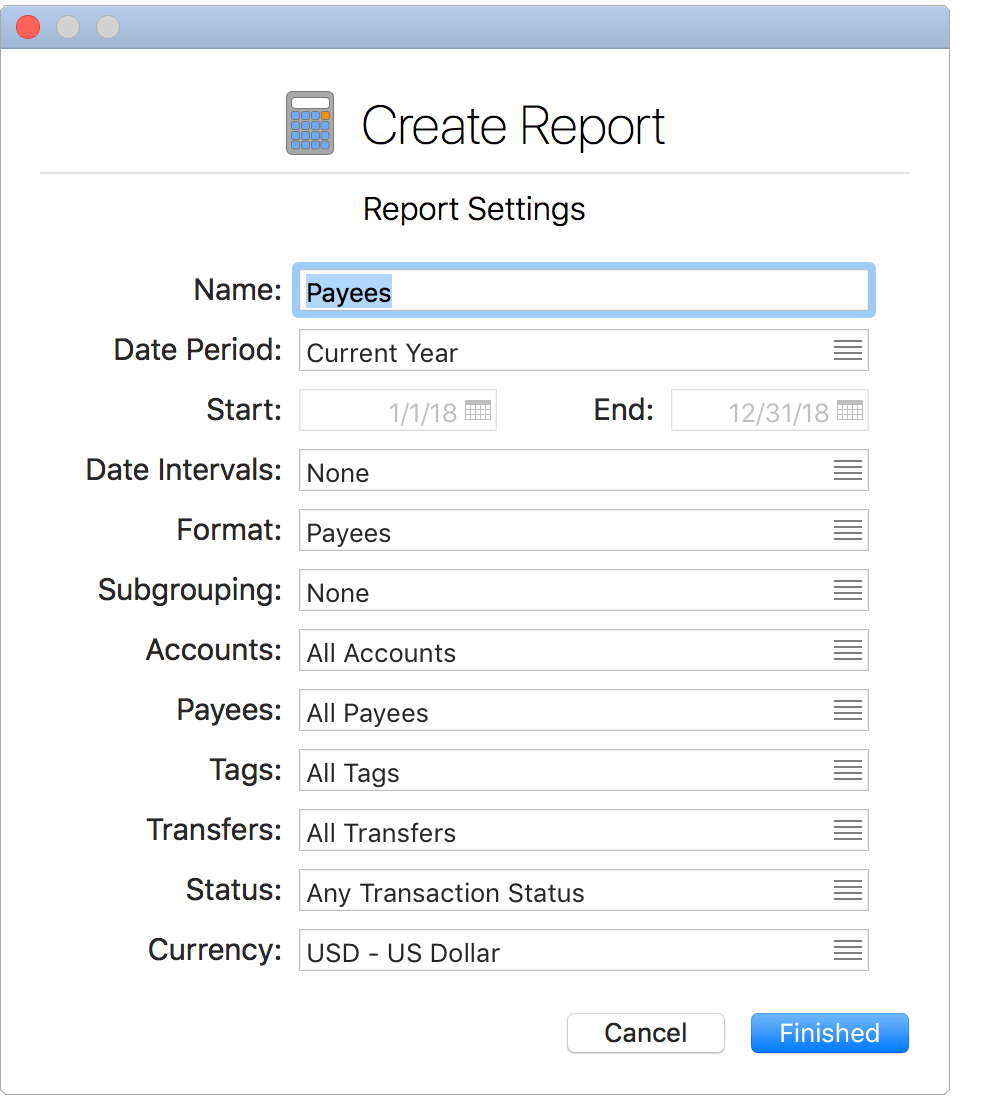
General settings:
- Name: The name to display for the report. Shown for the report's heading and in the list of reports.
- Date Period: The date range for the report. Select "Custom Date Range" to pick a specific date range or use one of the available date ranges such as "Current Year".
- Start: The starting date for the report's date range.
- End: The ending date for the report's date range.
- Date Intervals: The intervals to report within the date range. For example, a "Monthly" date interval for a report starting on the first of the year and ending on the last of the year will display information for every month.
- Format: How the report will be structured. Format options include: "Payees" (totals by payee), "Payees with Transactions" (totals by payee while listing the transactions for each payee), and "Transactions Only" (a list of all transactions that met the report's parameters).
- Subgrouping: The option to further breakdown payee totals by another item. Subgrouping options include: "None", "Account", "Transaction Type", "Category", and "Tag". For example, select the "Category" subgrouping option to get totals for each payee along with subtotals for each category/payee combination.
- Accounts: The accounts that will be included: "Specific Accounts", "All Accounts", or "All Taxable Accounts". You will be presented with the option to select the accounts in an additional step if "Specific Accounts" is chosen.
- Payees: The payees that will be included: "Specific Payees" or "All Payees". You will be presented with the option to select the accounts in an additional step if "Specific Payees" is chosen.
- Tags: The tags that will be included: "Specific Tags" or "All Tags". You will be presented with the option to select the accounts in an additional step if "Specific Tags" is chosen.
- Transfers: Whether or not account transfers are included. Options include: "All Transfers", "Don't Include Transfers" or "Include Transfers with Excluded Accounts". Transactions will be considered a transfer if its category is set to an account category or if it uses the "Transfer" transaction type.
- Status: Limit the transactions that can be included based on their status. For example, exclude transactions marked as "Pending" by using the "Non-Pending" option.
- Currency: The currency for the report's totals.
![]() Note:
Transaction amounts will be listed in their account's native currency.
All other listed currency amounts will be in the report's currency.
Note:
Transaction amounts will be listed in their account's native currency.
All other listed currency amounts will be in the report's currency.
Select specific accounts:
If you chose the option to "Specify Accounts", mark which accounts to "Include" in the report as desired and then select to "Continue" or to be "Finished" setting up the report depending if you have chosen to select specific payees or tags for the report.
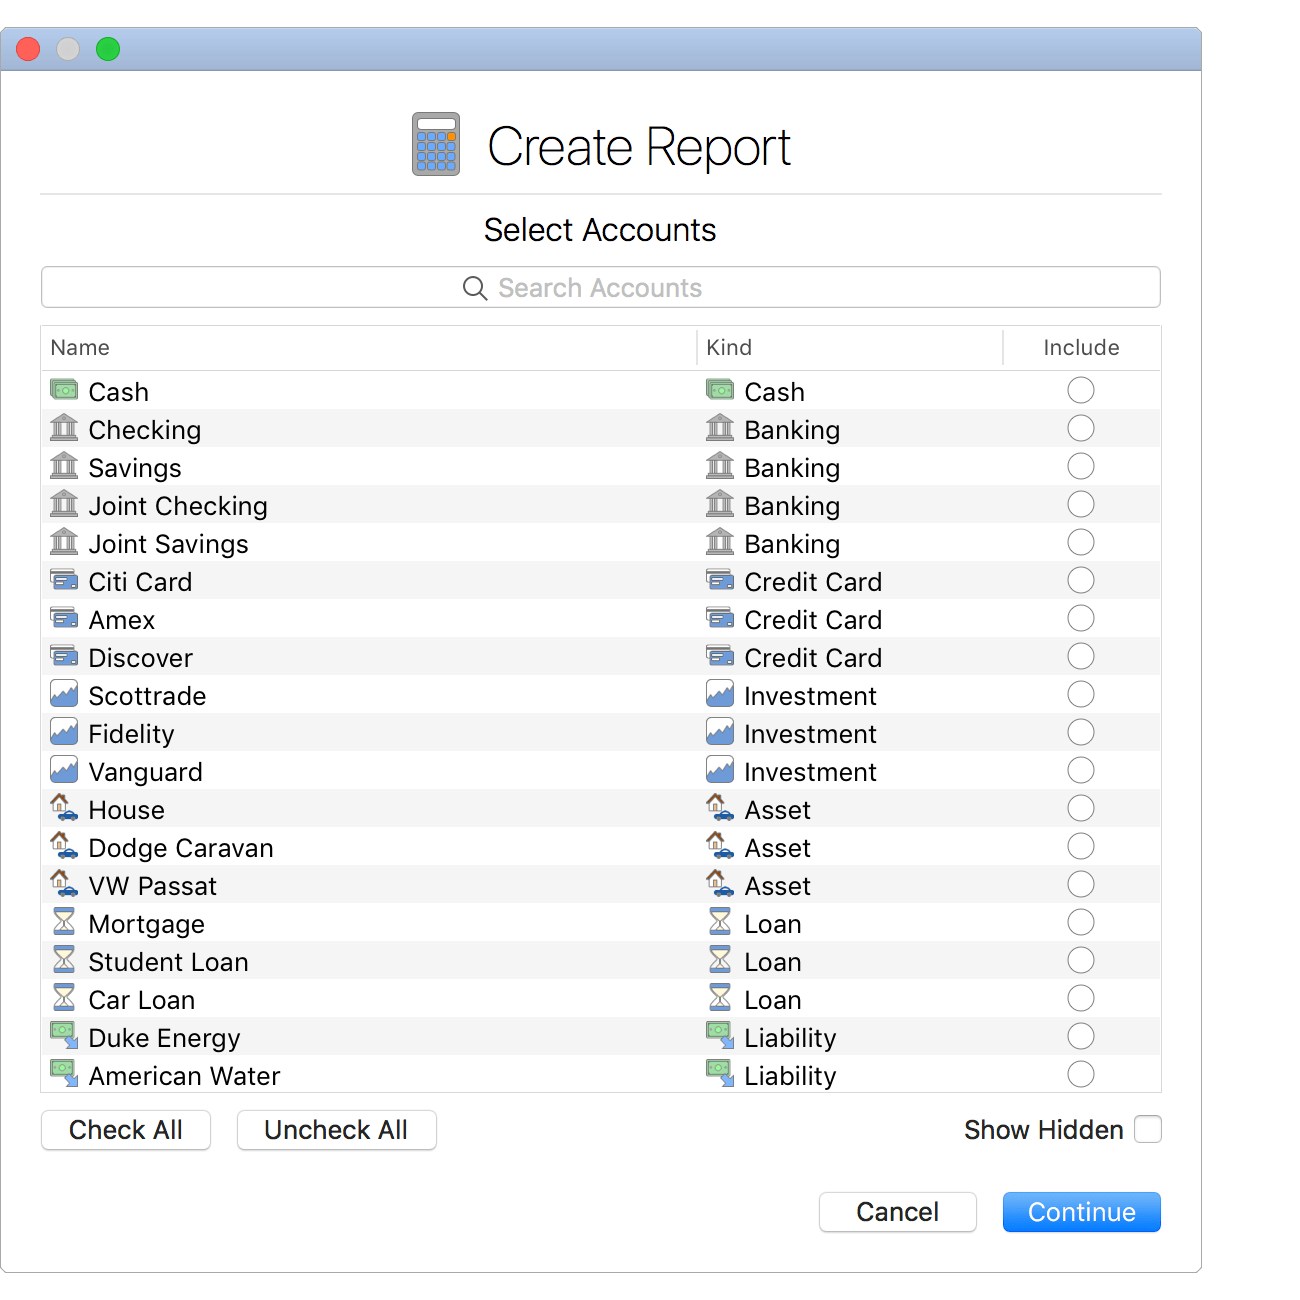
![]() Tip:
Use multiple selection and press the spacebar to toggle the "Include" checkboxes on/off.
Check the "Show Hidden" option to display accounts not marked to be included in reports.
Tip:
Use multiple selection and press the spacebar to toggle the "Include" checkboxes on/off.
Check the "Show Hidden" option to display accounts not marked to be included in reports.
Select specific payees:
If you chose the option to "Specify Payees", mark which payees to "Include" in the report as desired and then select to "Continue" or to be "Finished" setting up the report depending if you have chosen to select specific tags for the report.
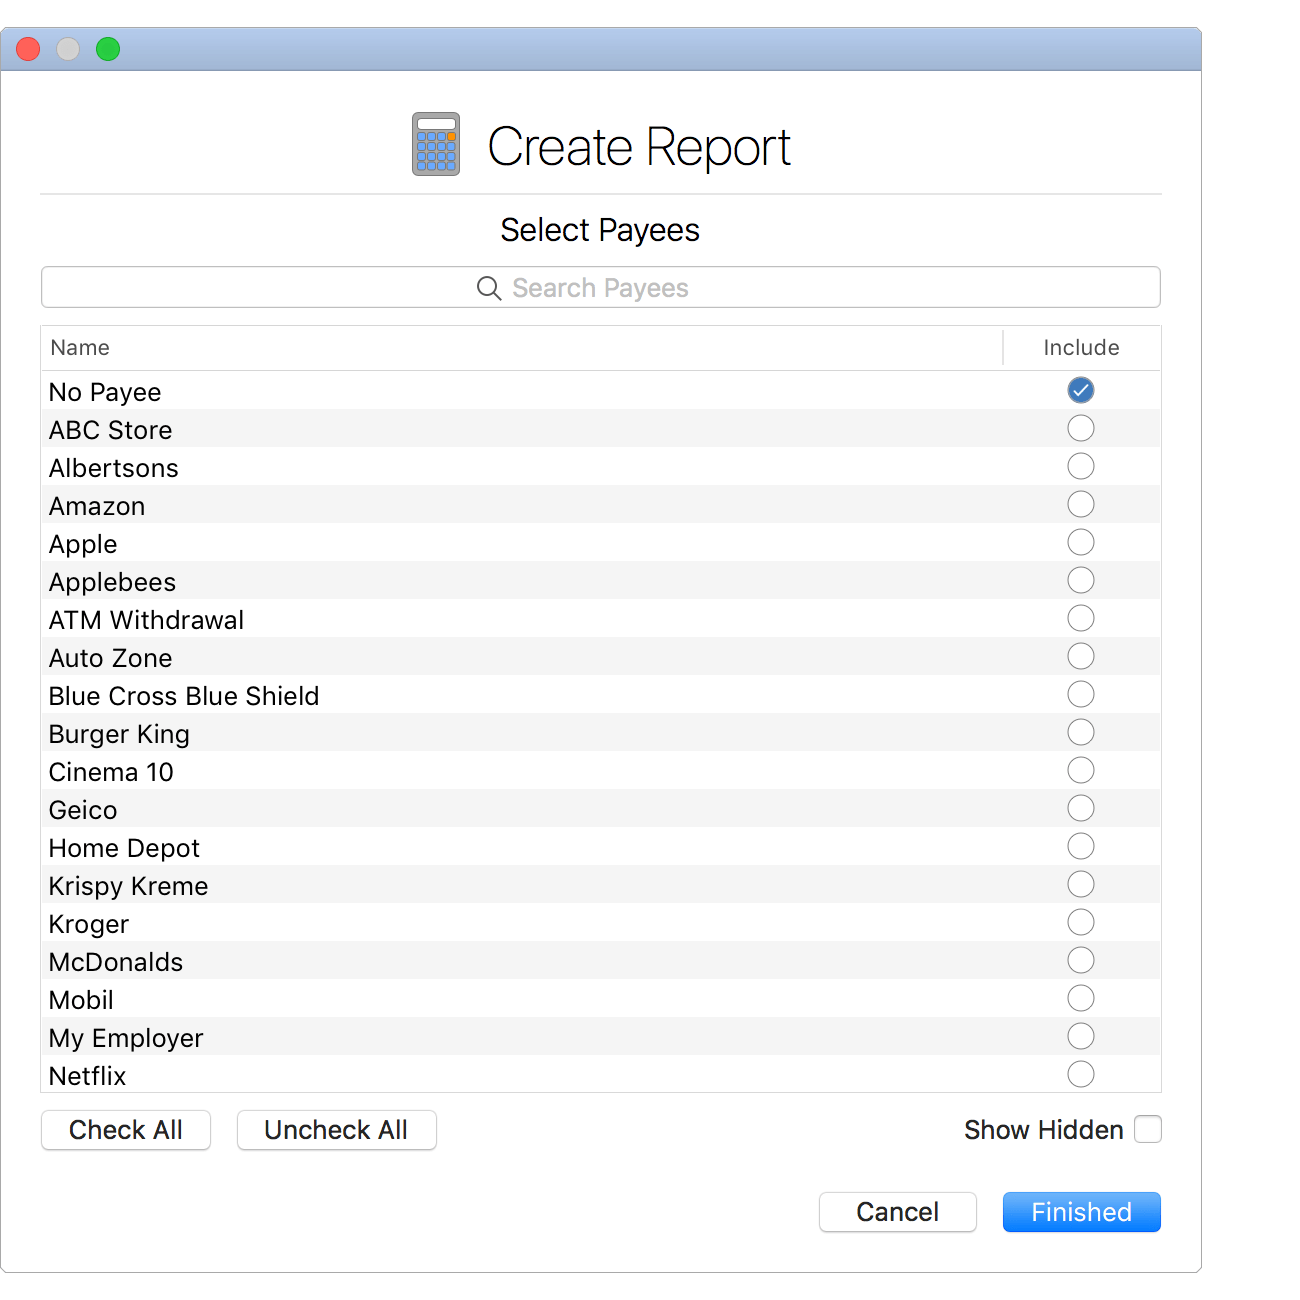
![]() Tip:
Use multiple selection and press the spacebar to toggle the "Include" checkboxes on/off.
Check the "Show Hidden" option to display payees not marked to be included in reports.
Tip:
Use multiple selection and press the spacebar to toggle the "Include" checkboxes on/off.
Check the "Show Hidden" option to display payees not marked to be included in reports.
![]() Note:
The "No Payee" option can be used to capture the transactions that are not listed with a payee.
The "Other Payee" option can be used to capture the transactions listed with payees that are not included in the report.
Note:
The "No Payee" option can be used to capture the transactions that are not listed with a payee.
The "Other Payee" option can be used to capture the transactions listed with payees that are not included in the report.
Select specific tags:
If you chose the option to "Specify Tags", mark which tags to "Include" in the report as desired and then select to be "Finished" setting up the report.
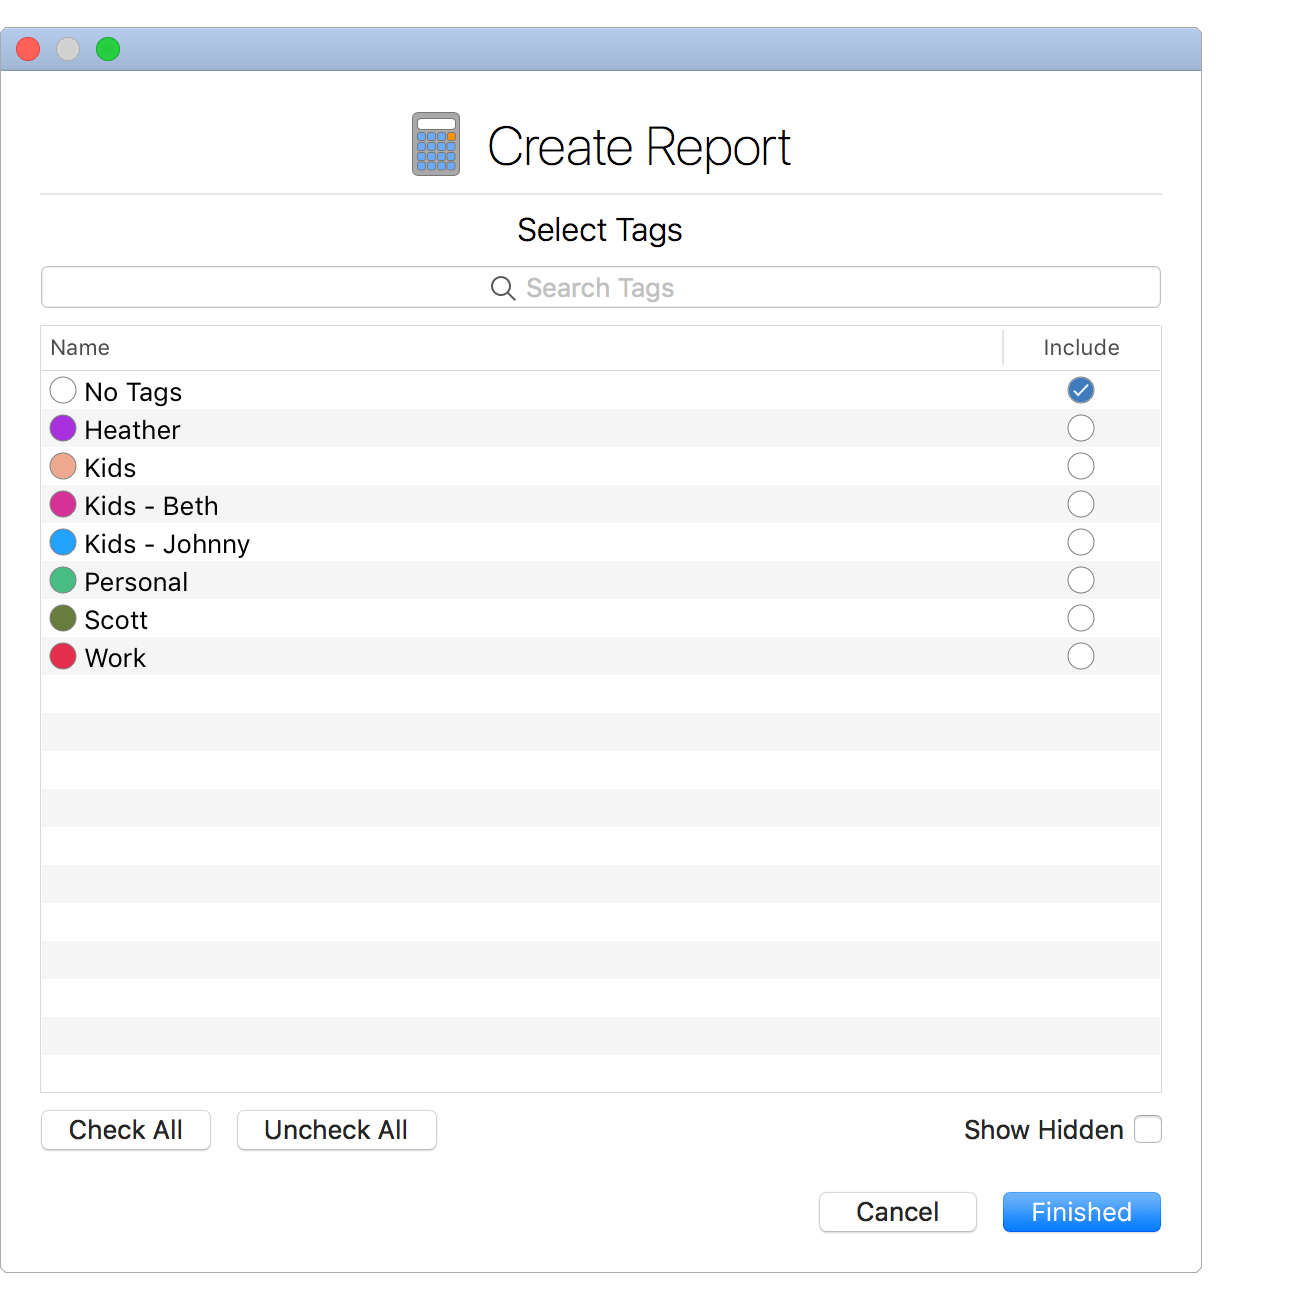
![]() Tip:
Use multiple selection and press the spacebar to toggle the "Include" checkboxes on/off.
Check the "Show Hidden" option to display tags not marked to be included in reports.
Tip:
Use multiple selection and press the spacebar to toggle the "Include" checkboxes on/off.
Check the "Show Hidden" option to display tags not marked to be included in reports.
![]() Note:
The "No Tags" option can be used to capture the transactions that are not listed with any tags.
Note:
The "No Tags" option can be used to capture the transactions that are not listed with any tags.